This is a continuation of my Telescope cam debugging blog.
Unfortunately it proved rather hard to obtain plastic mounting feet and screws tiny enough for me to be able to put the camera assembly in a small project box. However, I did realised I had a custom fit plastic camera housing to hand - the one I'd just cracked open.
I'd noticed earlier that metallic ring with Zeiss branding on the front of the camera was pretty much the same diameter as the 1½ inch eyepieces and adapters I have. Since I have two adapter rings (I was generously given a second one as part of a kit by mig5) I decided to glue an adapter ring straight onto the camera housing.
 With some minor violence I pulled the dust cover and metal ring off the housing. That exposed a few small plasic rings that I pulled out as well. The adapter ring turns out to fit exactly and some Zap Goo model glue is keeping that in place now. As a bonus the ring is threaded, so I can simply screw barlow lenses and filters into it.
Since I didn't need to remove the camera itself from its case, I had no need to desolder the USB ground cable. But I did need to avoid light spillage, so I needed to close the holes in the back of the housing where the hinge used to be attached. I had some silicon sealent laying around and a little dab of that in each hole seems to be doing an excellent job.
 The silicon is white though, as are the newly exposed plastic areas in front of the CCD where I broke off bits of plastic. A paint job was in order then. To reduce any chance of reflections, matt black was the obvious way to go. I picked some up when I got the model glue and after sealing the camera parts in a plastic bag and covering part of the adapter ring in masking tape I gave both the front and back of the housing a paint job (inside and out!) As a bonus the ugly Logitech logo is now no longer visible and the nasty cheap plastic looks much nicer.
 A bit of paint sprayed into a plastic bag and left to congeal for a few minutes will neatly black out the status LED. When all that had dried I finally desoldered and wrenched off the lens assembly before reassembling the camera and checking to see that it still worked.
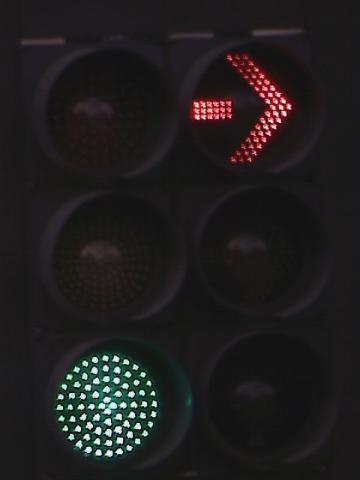
And work it does! Daytime images look odd due to the infra-red filter being gone, but first light on the traffic light up the road (about 100m away) resulted in the following image:
Now all I need to do is wait for a clear and dry night without too much wind :-)


Add new comment